

Start with a decision the sample can answer
A useful carry-system brief tells a sample maker who will wear the hiking backpack, what they will carry, which adjustments matter, and how the buyer will decide whether the sample works for the intended use. List the shoulder straps, back panel, hip belt if needed, sternum strap if needed, and adjustment hardware as connected decisions rather than independent features. “Padded straps” is a feature request; “our reviewers must be able to reach the adjuster while wearing the pack over the reference jacket” is a decision that can be checked.
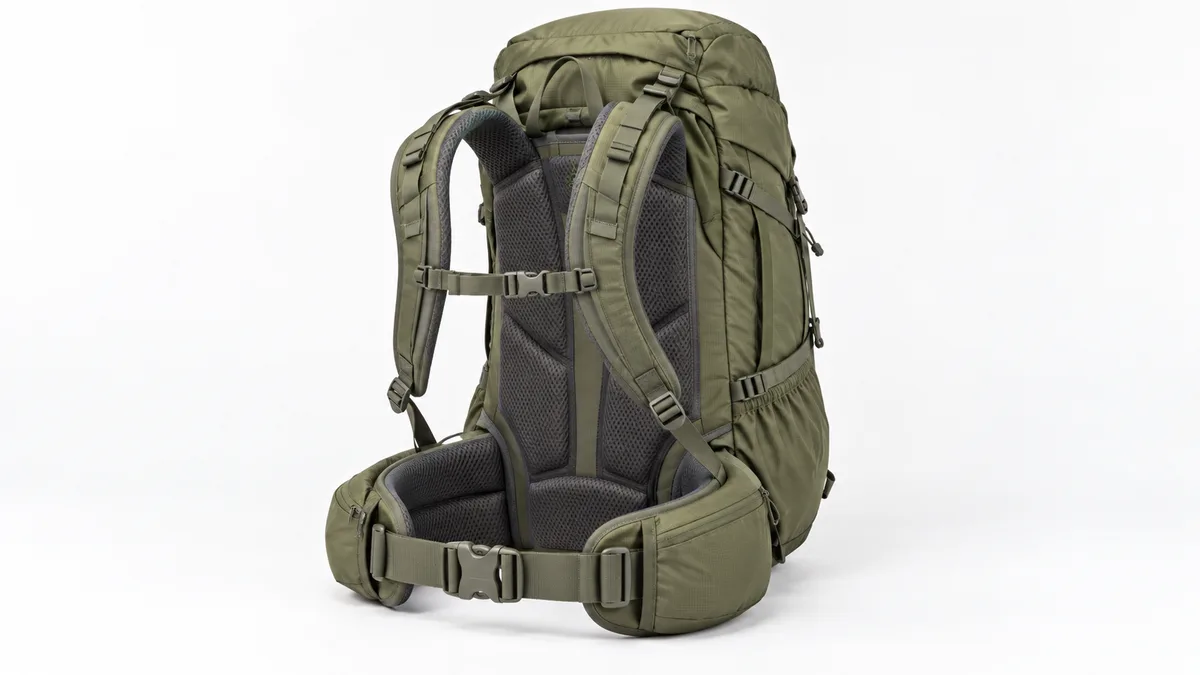
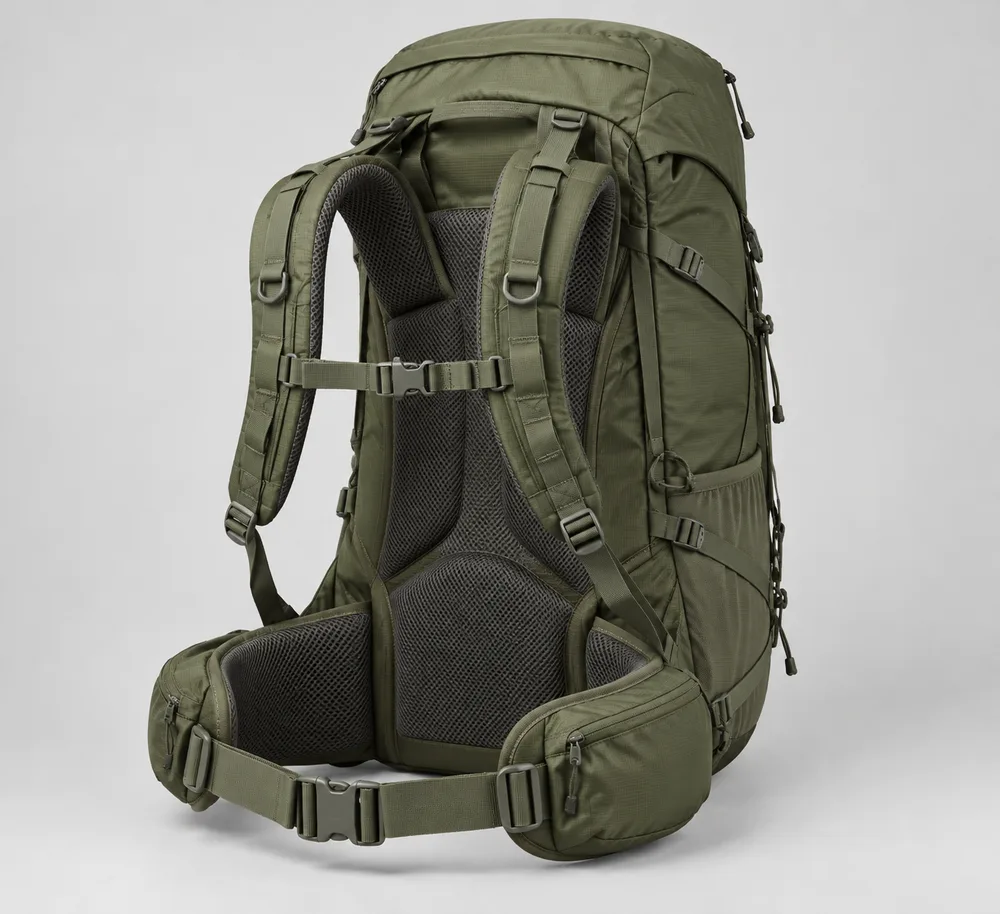
This guide turns that decision into a sequence: define the use scene, map the carry-system contact and adjustment points, send a reference kit, review a versioned sample with repeatable contents, log problems, and approve a clearly identified version. If your project needs a quantified load rating, fit range or named test, set the method and acceptance threshold separately. The backpack images below are AI-generated design concepts; the two labeled diagrams are original illustrations. Final construction is confirmed on an approved physical sample.
For manufacturing options and a project-specific discussion, see Custom Hiking Backpack Manufacturer. Use the brief below to make that conversation specific.
Start with the usage scene and the people who will evaluate it
Before drawing a strap, write down the use scene. Is the proposed bag intended for a short walk with frequent access to essentials, an extended outdoor trip with a fuller pack, or a travel-oriented product that happens to have hiking styling? Those are different buying problems. Describe how long the bag is typically worn, what is placed inside, whether people will put it on over bulky clothing, and whether they need to reach pockets without removing it. Avoid turning a marketing phrase such as “all-day comfort” into an untested technical promise.
Then define the evaluation group. A single colleague wearing an empty sample cannot represent every intended customer. The buyer can recruit several people who reflect the users it plans to serve and record each person's relevant body and clothing measurements, without claiming that this establishes a universal fit range. Ask them to describe the first adjustment they make, whether they can repeat it, and what changes after walking or reaching. Record observations individually; an average score can hide a clear problem for one part of the intended audience.
The brief should state what is known and what remains open. “We want the shoulder straps to adjust over a light jacket and a thicker layer” is testable if the buyer supplies those layers. “Hip belt closure must remain accessible while the main compartment holds our reference kit” can be checked on a sample. Put the intended observation beside each request so the maker and buyer understand the same target.
Turn the use scene into a review decision
Replace these examples with your actual users, clothing and contents before sending a brief.
| Buyer use scene | Carry-system trade-off to discuss | Sample action | Evidence to retain |
|---|---|---|---|
| Frequent access during a short outing | Strap placement versus access to side pockets while worn | Pack the buyer's reference items; ask reviewers to reach the intended pocket without removing the bag | Side-view photo, reviewer note, sample version |
| Longer wear with a fuller reference kit | Back-panel contact, shoulder-strap path and whether a belt is needed for the project | Repeat the agreed movement sequence with the same kit on each version | Packed-condition photo, adjustment positions, observation log |
| Use over changing clothing layers | Usable strap and belt travel versus loose webbing tails | Try each supplied clothing layer; record the setting each reviewer uses | Landmark measurements and front/back photos |
| Access while wearing other equipment | Buckle, pocket and strap interference | Use the actual reference equipment during the trial | Equipment list, interference photo, issue owner |
Brief field: use scene. Describe terrain or travel context, expected wear duration in qualitative terms, access pattern, weather exposure, and whether the pack is used over other equipment.
Brief field: reference user. State who will take part in sample review, what clothing they will wear, which body measurements are relevant to the intended fit, and whether the brief covers more than one size or adjustment setting. If the team does not yet know the target user range, flag it as an unresolved design input rather than guessing a range.
Brief field: representative contents. List the objects that will actually be packed during review. A water bottle, rain layer, equipment pouch or other familiar object is more useful than an unexplained total weight. Record each item's position as well as the packed configuration. The purpose is repeatability: the next sample should be reviewed under comparable conditions.
Turn the use scene into a carry-system map
The shoulder straps, back panel, hip belt and adjustment points should be considered as a system. Altering one part changes how the others sit. A thicker back-panel pad may move the bag away from the body. A different shoulder-strap curve may change where the sternum strap crosses the chest. A hip belt may look substantial on a flat table yet sit at the wrong height when the pack is worn. These are design possibilities to investigate, not predictions about the performance of a particular Hongzhao product.
Create a simple map of the points your team will inspect: upper and lower shoulder-strap attachments, strap curvature, adjustment webbing, back-panel contact zones, belt attachment, belt closure, and any removable or adjustable pieces. For each point, mark the reference location on the same drawing or approved sample photo so reviewers measure and photograph the same place on every revision.
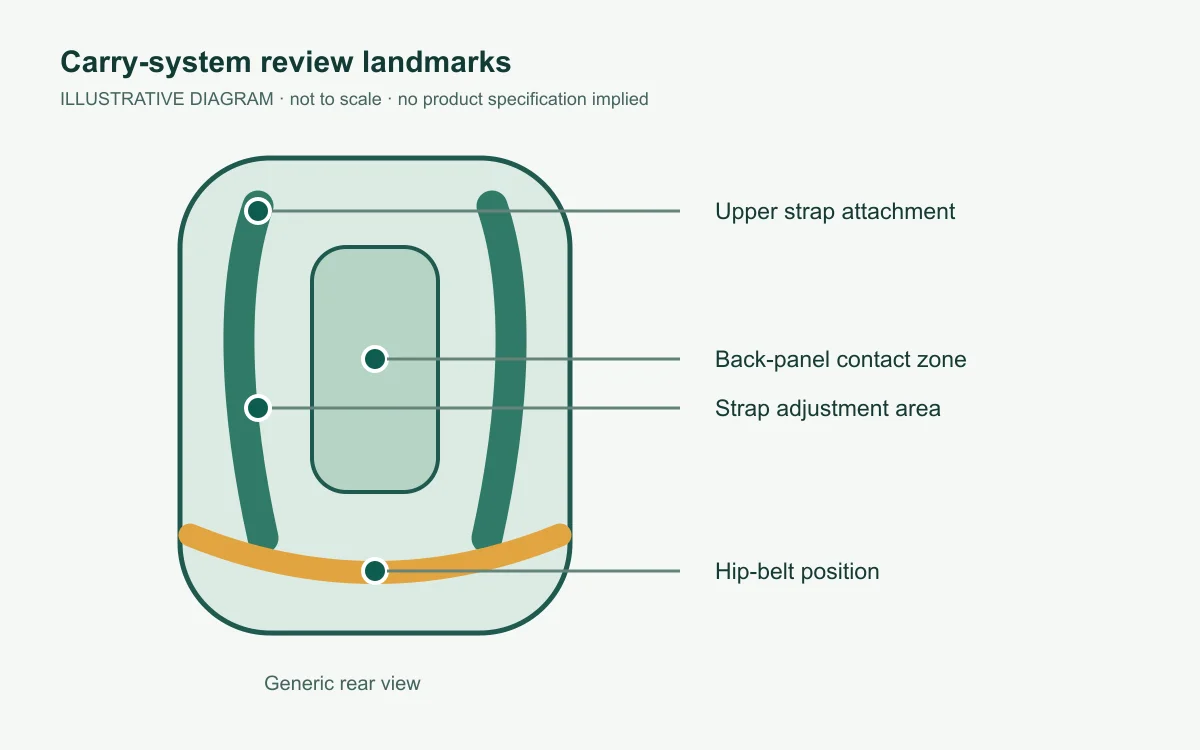
At each point, write three things: the requested configuration, how the reviewer can see or measure it, and who will decide whether a revision is needed. For example, a shoulder-strap request might specify that the adjuster be reachable while the pack is worn. The review action is to have each evaluator attempt that adjustment with the pack filled to the agreed reference condition. The decision is recorded as accepted, revise, or unresolved. This is more useful than a line that merely says “adjustable straps.”
Shoulder straps: geometry and usable adjustment
Ask how the straps meet the bag, how they pass over the evaluator's shoulders, and whether their shape allows the intended movement. The buyer need not prescribe every curve before seeing a sample, but it should identify any reference bag whose strap shape is important, supply photos from several angles, and say which features must not be copied. If the project calls for a particular padding feel, provide a physical reference or approved material swatch. A photograph cannot reliably communicate compression, edge feel or stitching stiffness.
During review, note whether the straps stay in the desired position, whether the adjustment ends can be handled without assistance, and whether the webbing has enough usable travel for the intended evaluators and clothing combinations. Record where the adjuster sits at the shortest and longest reviewed settings. Do not turn that observation into a promised fit range until the buyer and manufacturer agree on measurement landmarks and tolerances. If a sternum strap is included, check its accessible height and whether it interferes with the wearer's clothing or intended activity. The question is whether this particular sample works for the defined use, not whether a sternum strap is universally necessary.
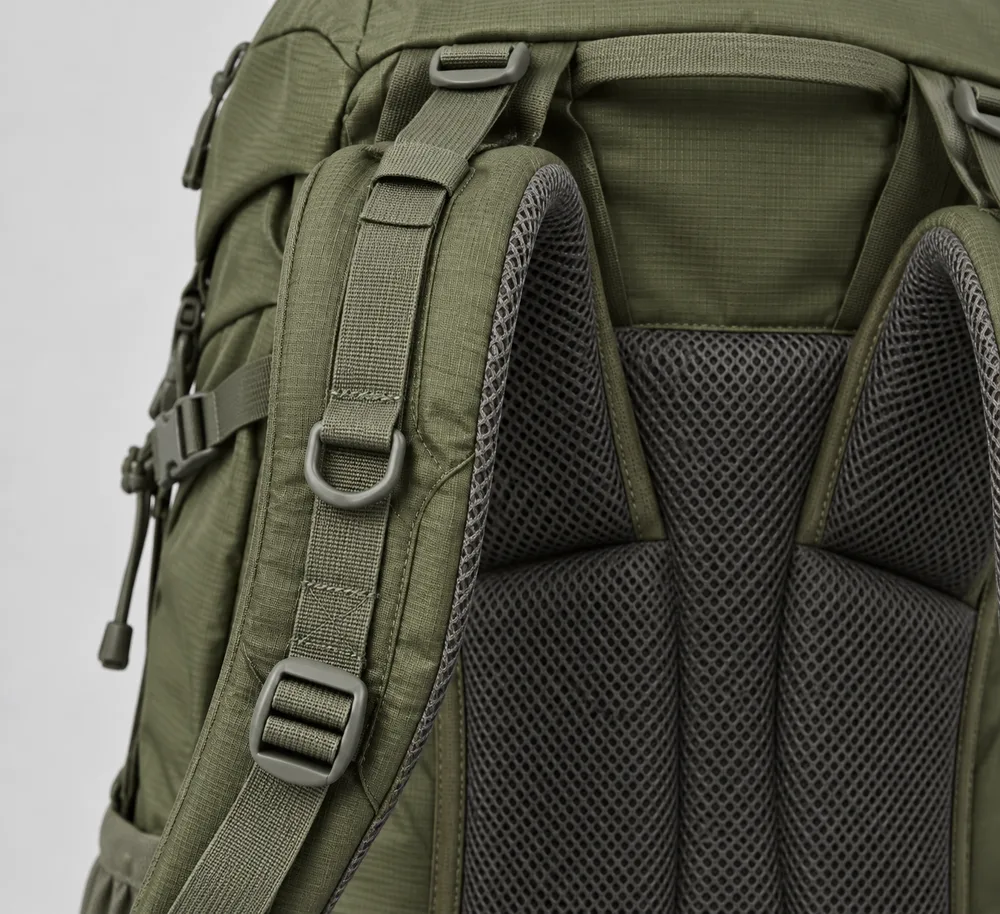
Consider stitch placement and edge finishing as inspection items. A buyer can ask for close-up photos of the attachment points and examine whether the webbing, binding and seams match the approved sample. That is a visual and construction review, not a strength test. If the product requires a quantified attachment strength, agree on a test method and obtain the result; do not infer a rating from neat-looking stitching.
Back panel: contact, spacing and access
The back panel influences how the bag meets the wearer, how it sits when packed, and how easy it is to inspect the construction. “Breathable” is often used casually, but a mesh surface by itself does not prove thermal comfort or airflow under use. Instead, specify the visible construction: the shape and placement of contact pads, mesh or fabric type to be approved, seams, channels if present, and any structural elements that can actually be inspected. Ask the reviewer what they feel during a defined trial, then record it as user feedback rather than a guaranteed outcome.
Inspect the pack in more than one state: empty, packed with the reference contents, and after the evaluators have adjusted it. Photograph the side profile and back view. Note whether the bag tilts, whether a hard or bulky item changes the perceived contact area, and whether zippers or hydration access remain usable. If the pack is meant to accommodate a specific insert or removable panel, provide that item for review. Ask for the component record or an approved construction view when an internal part matters to the decision.
For shell fabrics, lining and other material selection, use the separate Backpack Fabric Guide and the Material overview. This guide addresses the carry-system decision rather than repeating a fabric comparison. The buyer should still record which approved fabric and padding references are used in the sample, because a later material change can alter hand feel and dimensions.
Hip belt: decide its function before its appearance
Not every backpack needs the same belt construction. The buyer should first state why a belt is requested: stabilizing the pack, providing accessible pockets, changing the desired contact pattern, or simply matching a visual reference. Those intentions are not interchangeable. A belt can have padding, pockets and adjusters yet fail the buyer's intended use because it sits at a different position when the bag is packed and worn.
If the proposed style includes a hip belt, record its attachment method, where it emerges from the pack, how the two sides reach the buckle, and what happens when the evaluator moves or layers clothing. Ask evaluators to put the sample on and take it off without instruction, then repeat after adjustment. Note whether the buckle is accessible and whether the belt or pockets interfere with arm movement or nearby gear. Photographs should show the belt worn at the agreed reference setting; a studio front view alone cannot establish fit.
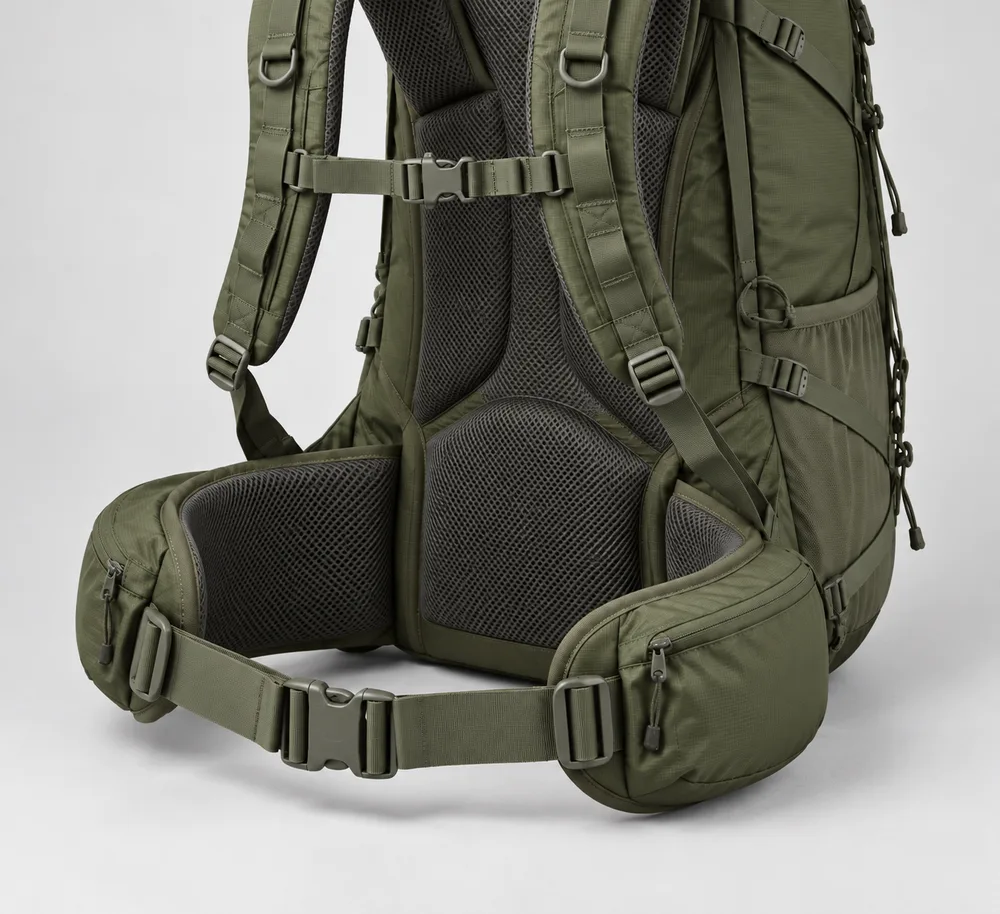
If the team needs a quantified load-transfer result, put the method, acceptance threshold and evidence owner in a separate test requirement. For an ordinary sample discussion, describe the belt's position, adjustment, contact and accessibility as observed.
Adjustment range: record landmarks, not vague flexibility
“Adjustable” can mean that a slider exists, but buyers need to know whether the usable travel covers the intended people and clothing. Define the measurement landmarks before comparing samples. Which point on the strap attachment is the start? Is the webbing measured to the buckle, to the slider, or to the end of its usable travel? Is the pack loaded while measuring? A drawing with labeled endpoints is more reliable than a table of unexplained numbers.
Prepare a measurement sheet that includes each adjuster, its position on the sample, the reference condition, a space for the buyer's target and tolerance, and a field for the measured sample result. Leave target and tolerance blank until the project team confirms them. Photograph the tape and the identified endpoints in the same frame. Repeat the observation on both sides if symmetry matters. Record any slip, twist or difficult-to-reach tail with a photo and an issue-log ID.
If multiple sample revisions are made, keep the landmark definitions unchanged. Otherwise, a longer number on one revision may reflect a different measuring point rather than a real improvement. Put the version and date on every sheet and image. This modest discipline is especially useful when a sourcing team, product manager and factory are reviewing the same sample from different locations.
What a buyer should send before sample development
A useful handover does not require a perfect engineering drawing, but it does require enough information to prevent the team from filling gaps with assumptions. Send the intended use scene, target customer description, reference bag images or physical samples, a list of features that are mandatory and optional, and a clear note about any third-party design that must not be copied. If the brand has fit data from its own users, explain how it was collected and whether it may be shared with the factory. Do not present an unverified marketing persona as measured fit evidence.
Provide a dimensioned reference for the bag body and the carry-system landmarks that matter to the project. Include the intended contents and their approximate dimensions or actual reference objects. Identify what must remain accessible while the bag is worn: bottle pocket, phone pocket, hydration routing, compression strap, or other components. If the brief uses the word “compatible,” define the exact object and the way compatibility will be checked. An undefined compatibility claim creates unnecessary risk for both buyer and manufacturer.
Supply material and trim references separately from the fit brief. A chosen webbing, foam or mesh may be a visual preference, a hand-feel requirement, or a tested component; state which one it is. If the buyer has not approved a component, mark it “proposal requested.” If a named standard or performance grade is required, attach the document and verification criteria so the sample team knows what to review.
Finally, identify decision owners. Who can approve the carry-system shape? Who approves appearance? Who decides whether a trial observation is a blocking issue? Who can accept a change to a component that affects both fit and cost? These roles need not be elaborate, but they should be explicit. It is common for a visually approved sample to remain unapproved as a fit reference because the people who will use it have not reviewed it yet.
Pre-sample submission checklist: use scene; reference users and clothing; physical or dimensioned reference contents; body and carry-system landmarks; mandatory and optional features; material/trim references; permitted photos and design rights; evaluation plan; decision owners; and any documented test requirements. Mark unknowns openly. An unknown that is visible in the brief is easier to resolve than an assumption hidden in the sample.
For a project-specific minimum order requirement, send the proposed style and customization requirements through Project Inquiry and ask the team to confirm the requirement for that project.
Review the sample with representative contents and repeatable observations
Before anyone puts on the sample, record its version, date, components and visible deviations from the current brief. Take front, back, side and open-compartment photographs. Note which adjusters are at their starting positions. Pack the agreed reference objects in the agreed locations. If a sample is compared with an earlier version, use the same reference contents where practical; otherwise mark the comparison as limited.
Ask each evaluator to adjust the bag without being told the “correct” result. Observe the sequence: which control they reach first, whether a strap twists, whether they can access the closure, and whether the pack settles differently after movement. Have them describe what they notice in their own words. Do not lead them with “Is the padding comfortable?” when the team really needs to know where the pack contacts their body and whether an adjustment changes that feeling.
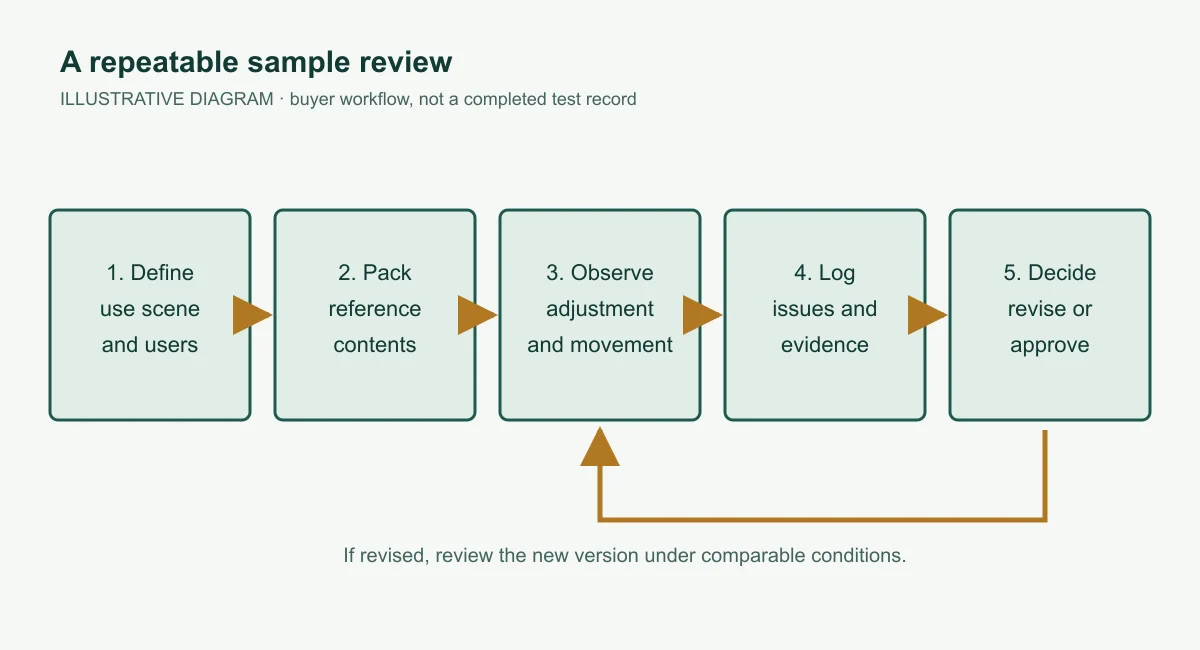
Use a short, agreed activity sequence appropriate to the intended use. It might include standing, walking, turning, reaching for an intended pocket and putting the bag down. Record the actual sequence and duration. If the use case involves particular clothing or external equipment, bring it to the review and note exactly what was worn.
For each observation, capture a photograph or short clip only with the evaluator's permission. Identify the version, evaluator code, pack condition and viewpoint. Separate a repeatable construction issue from a personal preference. For example, a slider that cannot be reached by any evaluator is different from one evaluator preferring a softer strap edge. Both can inform design, but they should not be given the same severity without discussion.
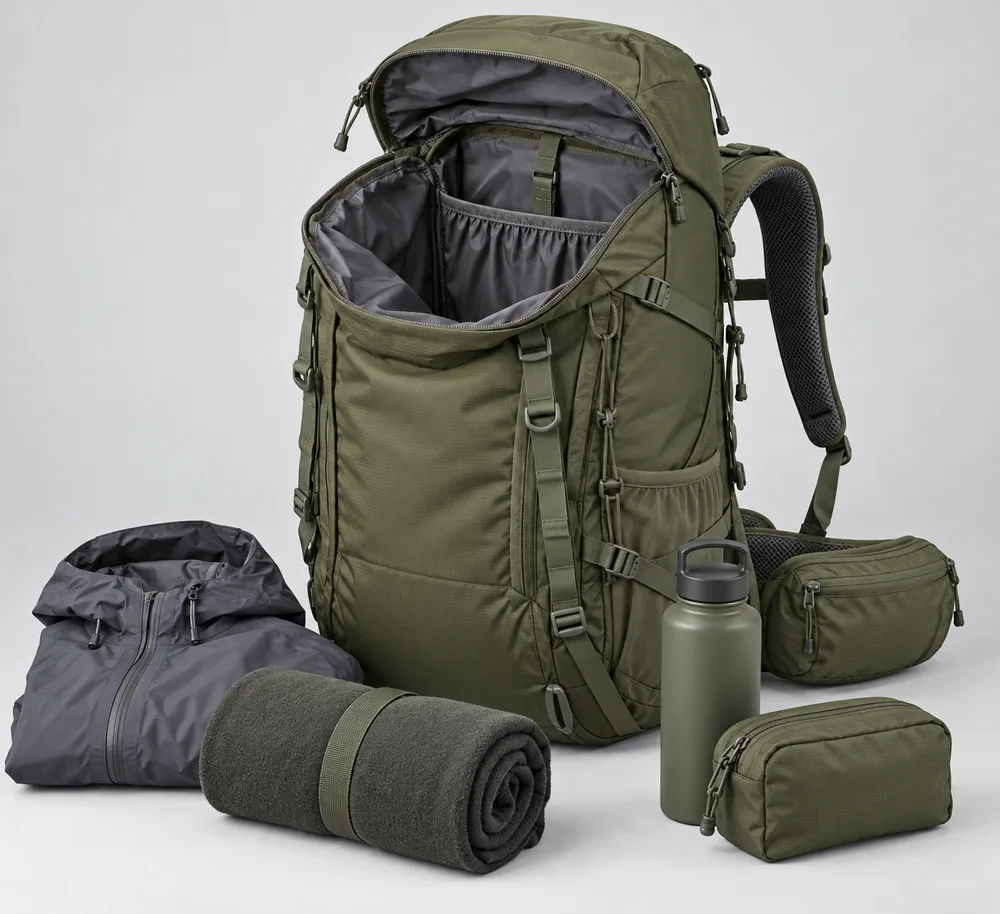
If the buyer supplies a reference bag, record which aspect is being compared: position, shape, access or hand feel. Review the proposed sample on its own merits under the agreed conditions. Where the brief requires a quantified result, keep the documented method and result linked to the exact sample version.
Use an issue log that connects observation to revision
A useful sample review sheet has one row per issue. Suggested fields are: sample version; date; reviewer or evaluator code; intended use condition; packing condition; exact location; observation; photo or video reference; impact on the buyer's intended use; proposed change; owner; target for the next sample; and status. Add a decision column with “accept,” “revise,” “needs evidence,” or “not applicable.”
Write observations in a way that another person can reproduce. “Strap feels wrong” is hard to act on. “With the agreed reference contents and outer layer, evaluator B could not reach the left shoulder adjuster while wearing the pack; video B-03 shows the attempt” is actionable. Avoid converting that into “left strap fails for all users.” The log should tell the sample maker exactly what to inspect on the next version and what would count as a satisfactory revision.
When a change is proposed, ask whether it affects other components. Moving an upper attachment may change the back-panel seam, zipper access or visible logo area. Changing padding may alter the finished dimensions. Shortening a webbing tail may improve neatness for one evaluator but remove usable travel for another. Put these dependencies on the revision sheet instead of approving each component in isolation.
Keep the old issue visible until the new sample is checked. A note saying “fixed” is not evidence if it lacks a reference to the reviewed revision. Photograph the changed location from the same angle. Have the decision owner sign off the observation, not merely the intent to make a change. For broader inspection concepts, see the site's Quality Control page; this guide focuses on buyer-side carry-system review, not the factory's full QC process.
Record measurements so the next sample can be compared
Set the measurement landmarks with the sample maker before filling in targets. The same word can mean a seam-to-seam dimension to one team and a free webbing length to another. The buyer confirms each landmark and tolerance; the sample maker or reviewer measures the physical version under the stated condition. Values remain unfilled until a real project supplies them.
Record header: project/style: Buyer to define; sample version: To be assigned; review date: To be recorded; evaluator/reviewer: To be recorded; clothing layer: Buyer to define; reference contents and their placement: Buyer to define; measurement tool and method: Buyer to define. Attach one photo showing the packed condition before the first row is assessed.
| Measurement or review object | Landmarks and unit to agree | Buyer target / tolerance | Sample result | Loading and wear condition | Decision and repeat-check evidence | Version / reviewer / date |
|---|---|---|---|---|---|---|
| Upper strap anchor spacing | Center of left upper attachment to center of right upper attachment; mm | Buyer to define | To be measured | Empty and packed states noted separately | To be reviewed; rear photo with tape | To be recorded |
| Left and right shoulder-strap usable travel | Agreed upper strap reference to lower adjuster at each usable end; mm, left/right separately | Buyer to define | To be measured | Reference clothing layers and contents listed above | To be reviewed; two setting photos per side | To be recorded |
| Back-panel contact-zone height | Top to bottom of the designated padded contact area; mm | Buyer to define | To be measured | Pack condition stated, then reviewer notes contact while worn | To be reviewed; rear and side views | To be recorded |
| Hip-belt wing reach, if specified | Body attachment seam to agreed buckle-side landmark; mm, left/right separately | Buyer to define | To be measured | Reference clothing and packed condition stated | To be reviewed; worn front and side photos | To be recorded |
| Sternum-strap height travel, if specified | Agreed top and bottom usable points of the sternum-strap attachment; mm | Buyer to define | To be measured | Worn over each reference clothing layer | To be reviewed; front photos at both settings | To be recorded |
| Adjustment access during use | Location of each specified buckle/slider; observation, not a dimension | Buyer to define as a pass condition | To be observed | Named reviewer follows the agreed stand/walk/reach sequence | To be reviewed; short clip or issue-log ID | To be recorded |
Keep the filled record next to the issue log. Where a result fails the buyer's agreed target, identify the exact row, photo and next version to check. Where the buyer changes the target, record that decision separately from a change to the physical sample.
Final approval is a condition, not a feeling
Set the approval rule before the last round of sampling. At minimum, the buyer should know which version is the reference, whether its appearance and carry-system construction match the agreed brief, whether each high-priority issue has a recorded disposition, and whether any required independent test or document has been obtained. Approval should identify the exact images, component references and issue-log revision that define the accepted sample.
Some issues may be accepted as trade-offs. Record what was accepted, for which use scene, by whom and on what evidence. Keep fit and appearance decisions separate in the approval sheet so a visual sign-off cannot accidentally close an unresolved wear issue.
Ask the team to compare the approved sample with the production specification before a production decision. Check that the carry-system drawing, trim list and sample photos refer to the same version. If a material, hardware or pattern change is introduced afterward, decide whether that change requires another review. A manufacturing inquiry can begin before all details are locked, but the quotation and production decision should not obscure unresolved fit requirements.
The simplest useful approval statement is specific: “Version [ID], reviewed with [reference contents] and [evaluation group] under [recorded conditions], is accepted for [defined project scope], subject to [listed open documents, if any].” Attach the drawing, trim list, issue log and photos that define that version.
Questions buyers commonly ask
Do I need to provide exact carry-system dimensions before contacting a manufacturer?
No. You can start with the intended users, use scene, reference objects and the decisions you need the sample to answer. However, any dimension that is important to fit, equipment access or compatibility should eventually have an agreed measuring point and acceptance method. Mark unknown dimensions as open inputs rather than implying that the factory will know your target customers without a brief.
What evidence should support a capacity, frame-material or fit statement?
Use a dimensioned specification or measured volume method for capacity, a component record or approved construction view for hidden frame material, and a defined sample review for the intended fit group. Link each record to the sample version. A studio image is useful for appearance and visible construction, but it is not the record for a hidden component or fit decision.
Should every reviewer carry the same contents?
For a direct comparison between revisions, use an agreed reference set and record any departures. Additional contents may be worth testing for a particular buyer scenario, but label those trials separately. The goal is not to force every person into identical use; it is to make the comparison interpretable.
What if two evaluators disagree about the back panel or straps?
Record both observations with the conditions in which they occurred. Check whether the disagreement tracks a different adjustment, clothing layer, packing arrangement or intended user group. Then decide whether the product needs a design change, a clearer adjustment instruction, a narrower target audience, or another evaluation. Do not average away a serious issue without examining it.
When is a sample ready for final approval?
When the buyer has identified the exact sample version; reviewed the carry system under its defined conditions; resolved or explicitly accepted the relevant issues; and attached any required technical evidence. Send the same approved reference, drawings and issue log to everyone preparing the next stage.
Send a brief the sample team can act on
A productive first inquiry includes the proposed style, use scene, intended users, reference contents, desired carry-system features, available drawings or samples, and the decisions the buyer wants a first sample to answer. Attach only images and designs that the buyer is permitted to share. State which measurements and performance requirements are confirmed and which still need discussion. Ask the team to confirm the project-specific minimum order requirement against the proposed style and customization details rather than assuming a fixed number from a general article.
Use the Project Inquiry form to send those inputs. Identify the proposed hiking-backpack construction, the decisions you want the first sample to answer and any documents still to be supplied. The team can then review a concrete brief rather than a list of adjectives.
Further Reading
Related Products